

This post may contain affiliate links, meaning we might make a small commission off any purchases at no additional cost to you.
 6
 0
I rented an RV for the first time in my life in 2024. I found that even after viewing the how-to videos from the rental company numerous times it still took me a long time to figure out how everything works. Now that I understand it better I feel like I want to share that information in much simpler terms so others can hopefully have an easier time.
2 important points first:
1. I’m sure I still don’t know everything so I’d love members to chime in with their additions. But please keep it always in very simple language so future users can only benefit from it.
2. I only did this 1 time and it’s very likely that other RVs have small differences. I did speak to a number of other people and compared notes but please realize I am just sharing whatever knowledge my own experiences have provided me.
Driving
Driving an RV is very different from driving a car or even a large van. The main thing you have to get used to when driving the RV is the fact that you have to be extremely careful when making turns. If you will look at the typical cars & vans we drive you will see that the back wheels are basically all the way towards the back of the vehicle. There isn’t that much of the vehicle sticking out behind the back wheels, maybe a foot or 2. By many RVs there could be many feet sticking out beyond the back wheels. Because of that extra length, when you make a turn with an RV that extra length beyond the wheels can bang into things nearby on both sides that ordinary vehicles don’t. Make sure that you take your turns very slowly and keep looking in the mirror as you turn to ensure that your rear of your RV is not bumping in to anything. Try to make as wide a turn as you can and try not to turn until you can see that those rear wheels have already passed whatever is on your side.
There are many components of the RV and some of them took me quite a while to learn.
Water
Each RV comes with a toilet, shower, and kitchen sink. How are they getting water? The RV comes equipped with a storage tank of water underneath. When you rent the RV it will be filled with water. But that water will eventually get used up! That’s when you’ll need to refill the tank. Most RVs today have a panel that you can check to see how full or empty the tank is. See below how to read that panel. When the tank is nearing empty you’ll need to go to a water fill place. Many gas stations have them and they could be in other places as well. Make sure the place says that it’s “potable water”- that’s just a fancy name for clean, drinkable water. When you get to the water fill place, look underneath the RV and in one of the compartments you’ll find a long hose
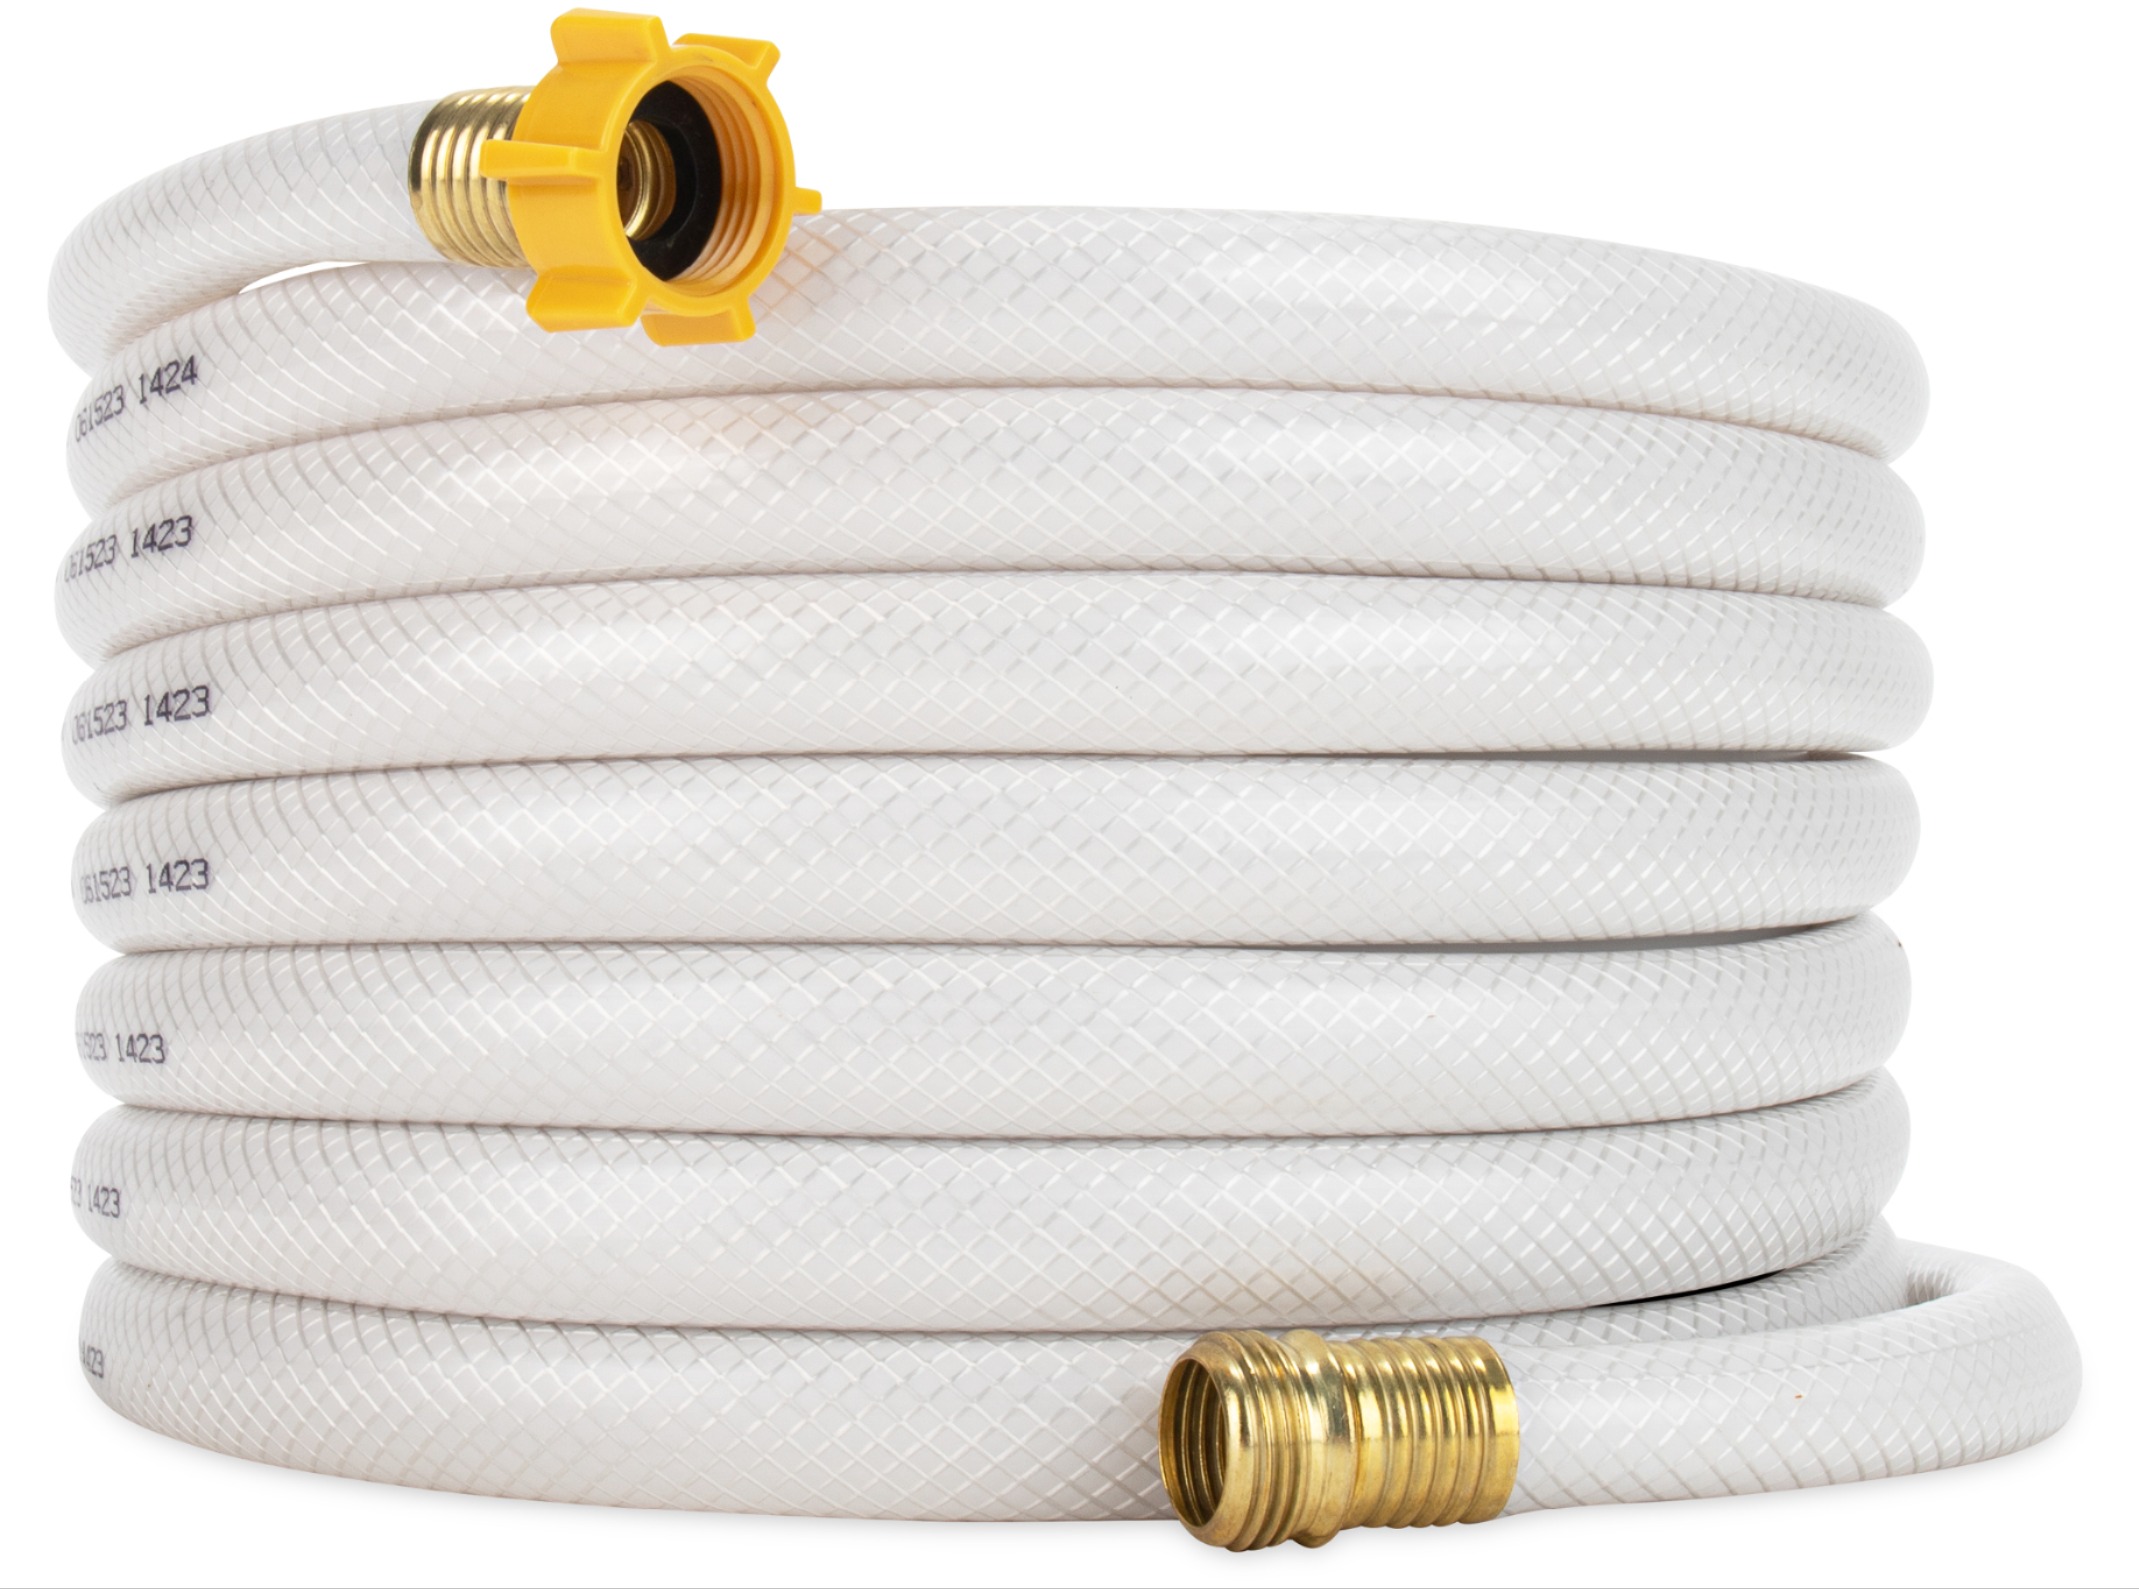
(very similar to a garden hose that waters grass). You’ll need to screw one end of the hose into the water fill faucet & the other end of the hose into your RV where it says “tank fill” (Do NOT screw it into the place on the side of the RV where it says “city fill”- that will not fill up your tank).
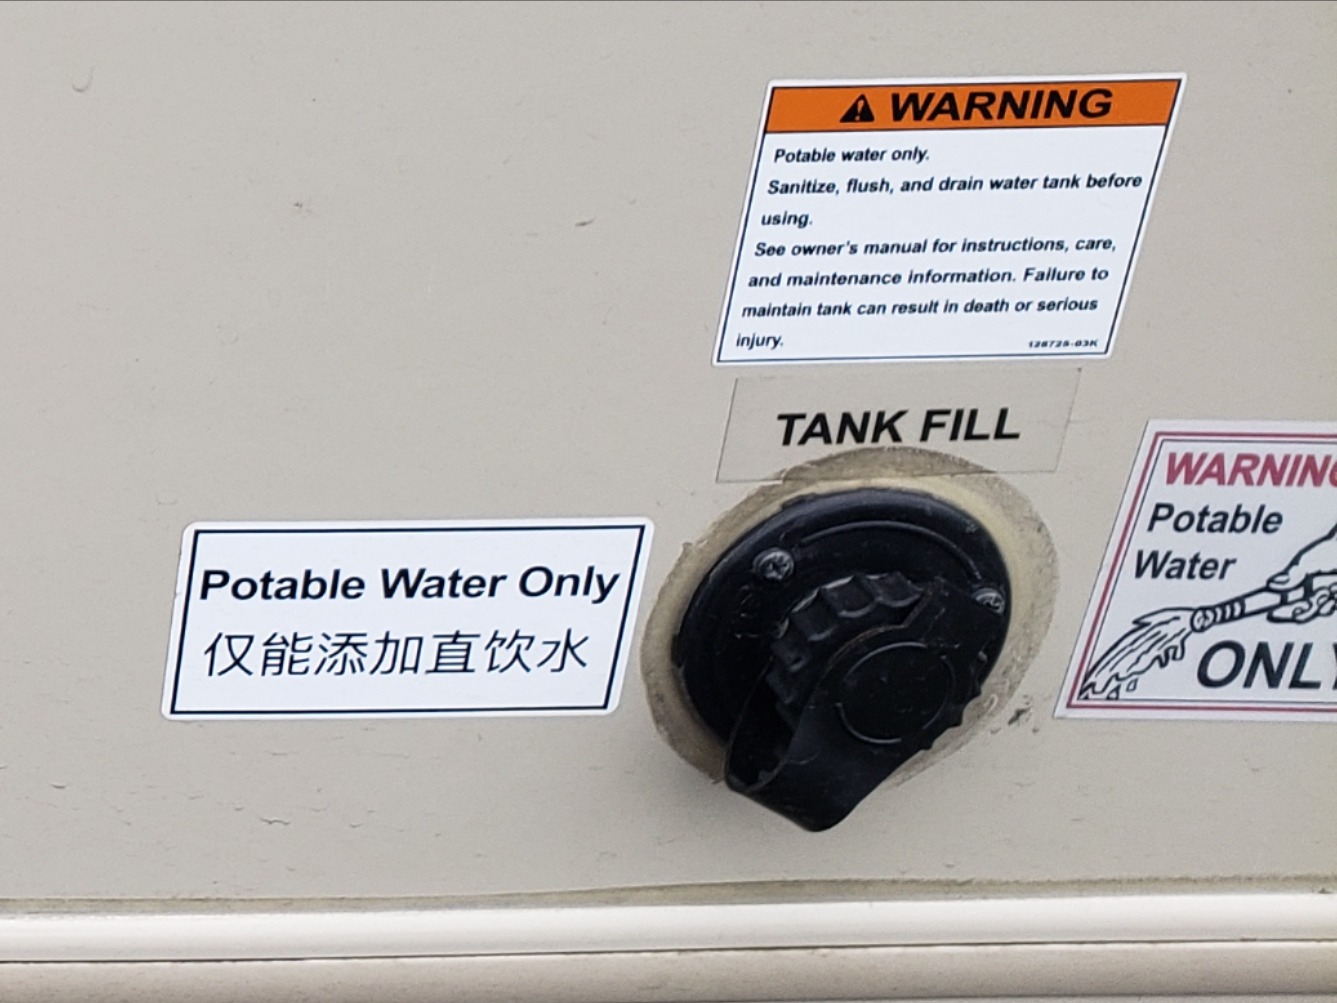
Once both sides are screwed in, turn on the faucet and water will begin to flow into your tank (companies actually recommend that you first turn on the faucet before screwing it into your RV until you see water running out of the hose so that you don’t pump air into your tank. Then shut the faucet, screw it into your RV & turn it back on). Keep checking the panel that shows how empty or full the tank is. When it shows that the water tank is full, turn off the faucet, unscrew both ends, make sure to shake all water out of your hose (otherwise that water will drip into your compartment beneath the RV), and return the hose to the compartment beneath your RV.
Sewer
All the water that you use in the kitchen sink & shower doesn’t just run into the street. So too for every time you flush the toilet. There are 2 separate tanks beneath your RV that store all that. The one that stores your used water from sink & shower is called the “grey” tank. The one that stores all the flushed toilet is called the “black” tank. Obviously they need to be emptied once in a while too. On the same panel that shows how much water is in your tank, there is also a way to see how the grey & black tanks are doing. See below for how to read the panel. When the panel shows that your grey, black or both tanks are full- it is time to empty the tanks. Don’t be scared or grossed out. It is a simple, easy, clean method. What you’re looking for is something called a “dump station”.
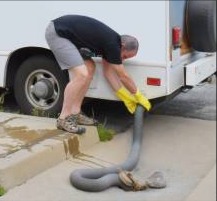
Some gas stations have them, most RV campsites have at least one, or you’ll have to google for the closest “dump station”. When you drive up to the dump station you’re basically looking for something that has a pipe going deep into the ground with a cover on it. Make sure that the side of the RV that has the dump connections are on the same side as the dump station. In most RVs today there is a compartment in the back of the RV that holds the hose for this. The compartment looks almost like a bumper of the RV. (First put on some disposable gloves!) You’ll see that you can pull open a cap on either side of it. Inside of the compartment you’ll find a hose. It usually has ridges in it that can make it be stretched out; one side of the hose has a screw on kind of apparatus, the other side has nothing.
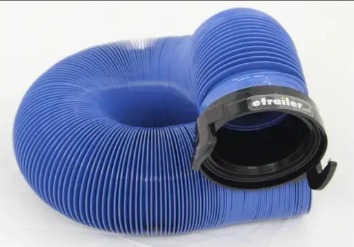
Remove the hose. Go over to the hole in the ground of the dump station, lift up the cover, and insert the end of the hose that has nothing on it into the hole in the ground. It is best to try to secure that end in some way so that it doesn’t pop out by mistake. Either let then cover go back on the hose or many people put some heavy stones on it to secure it. Then go over to the dump connection on the bottom part of your RV. You should see a pipe that has 2 levers, one on each side. 1 lever should say “grey” & one should say “black”. The pipe will have a screw-on cover on it.
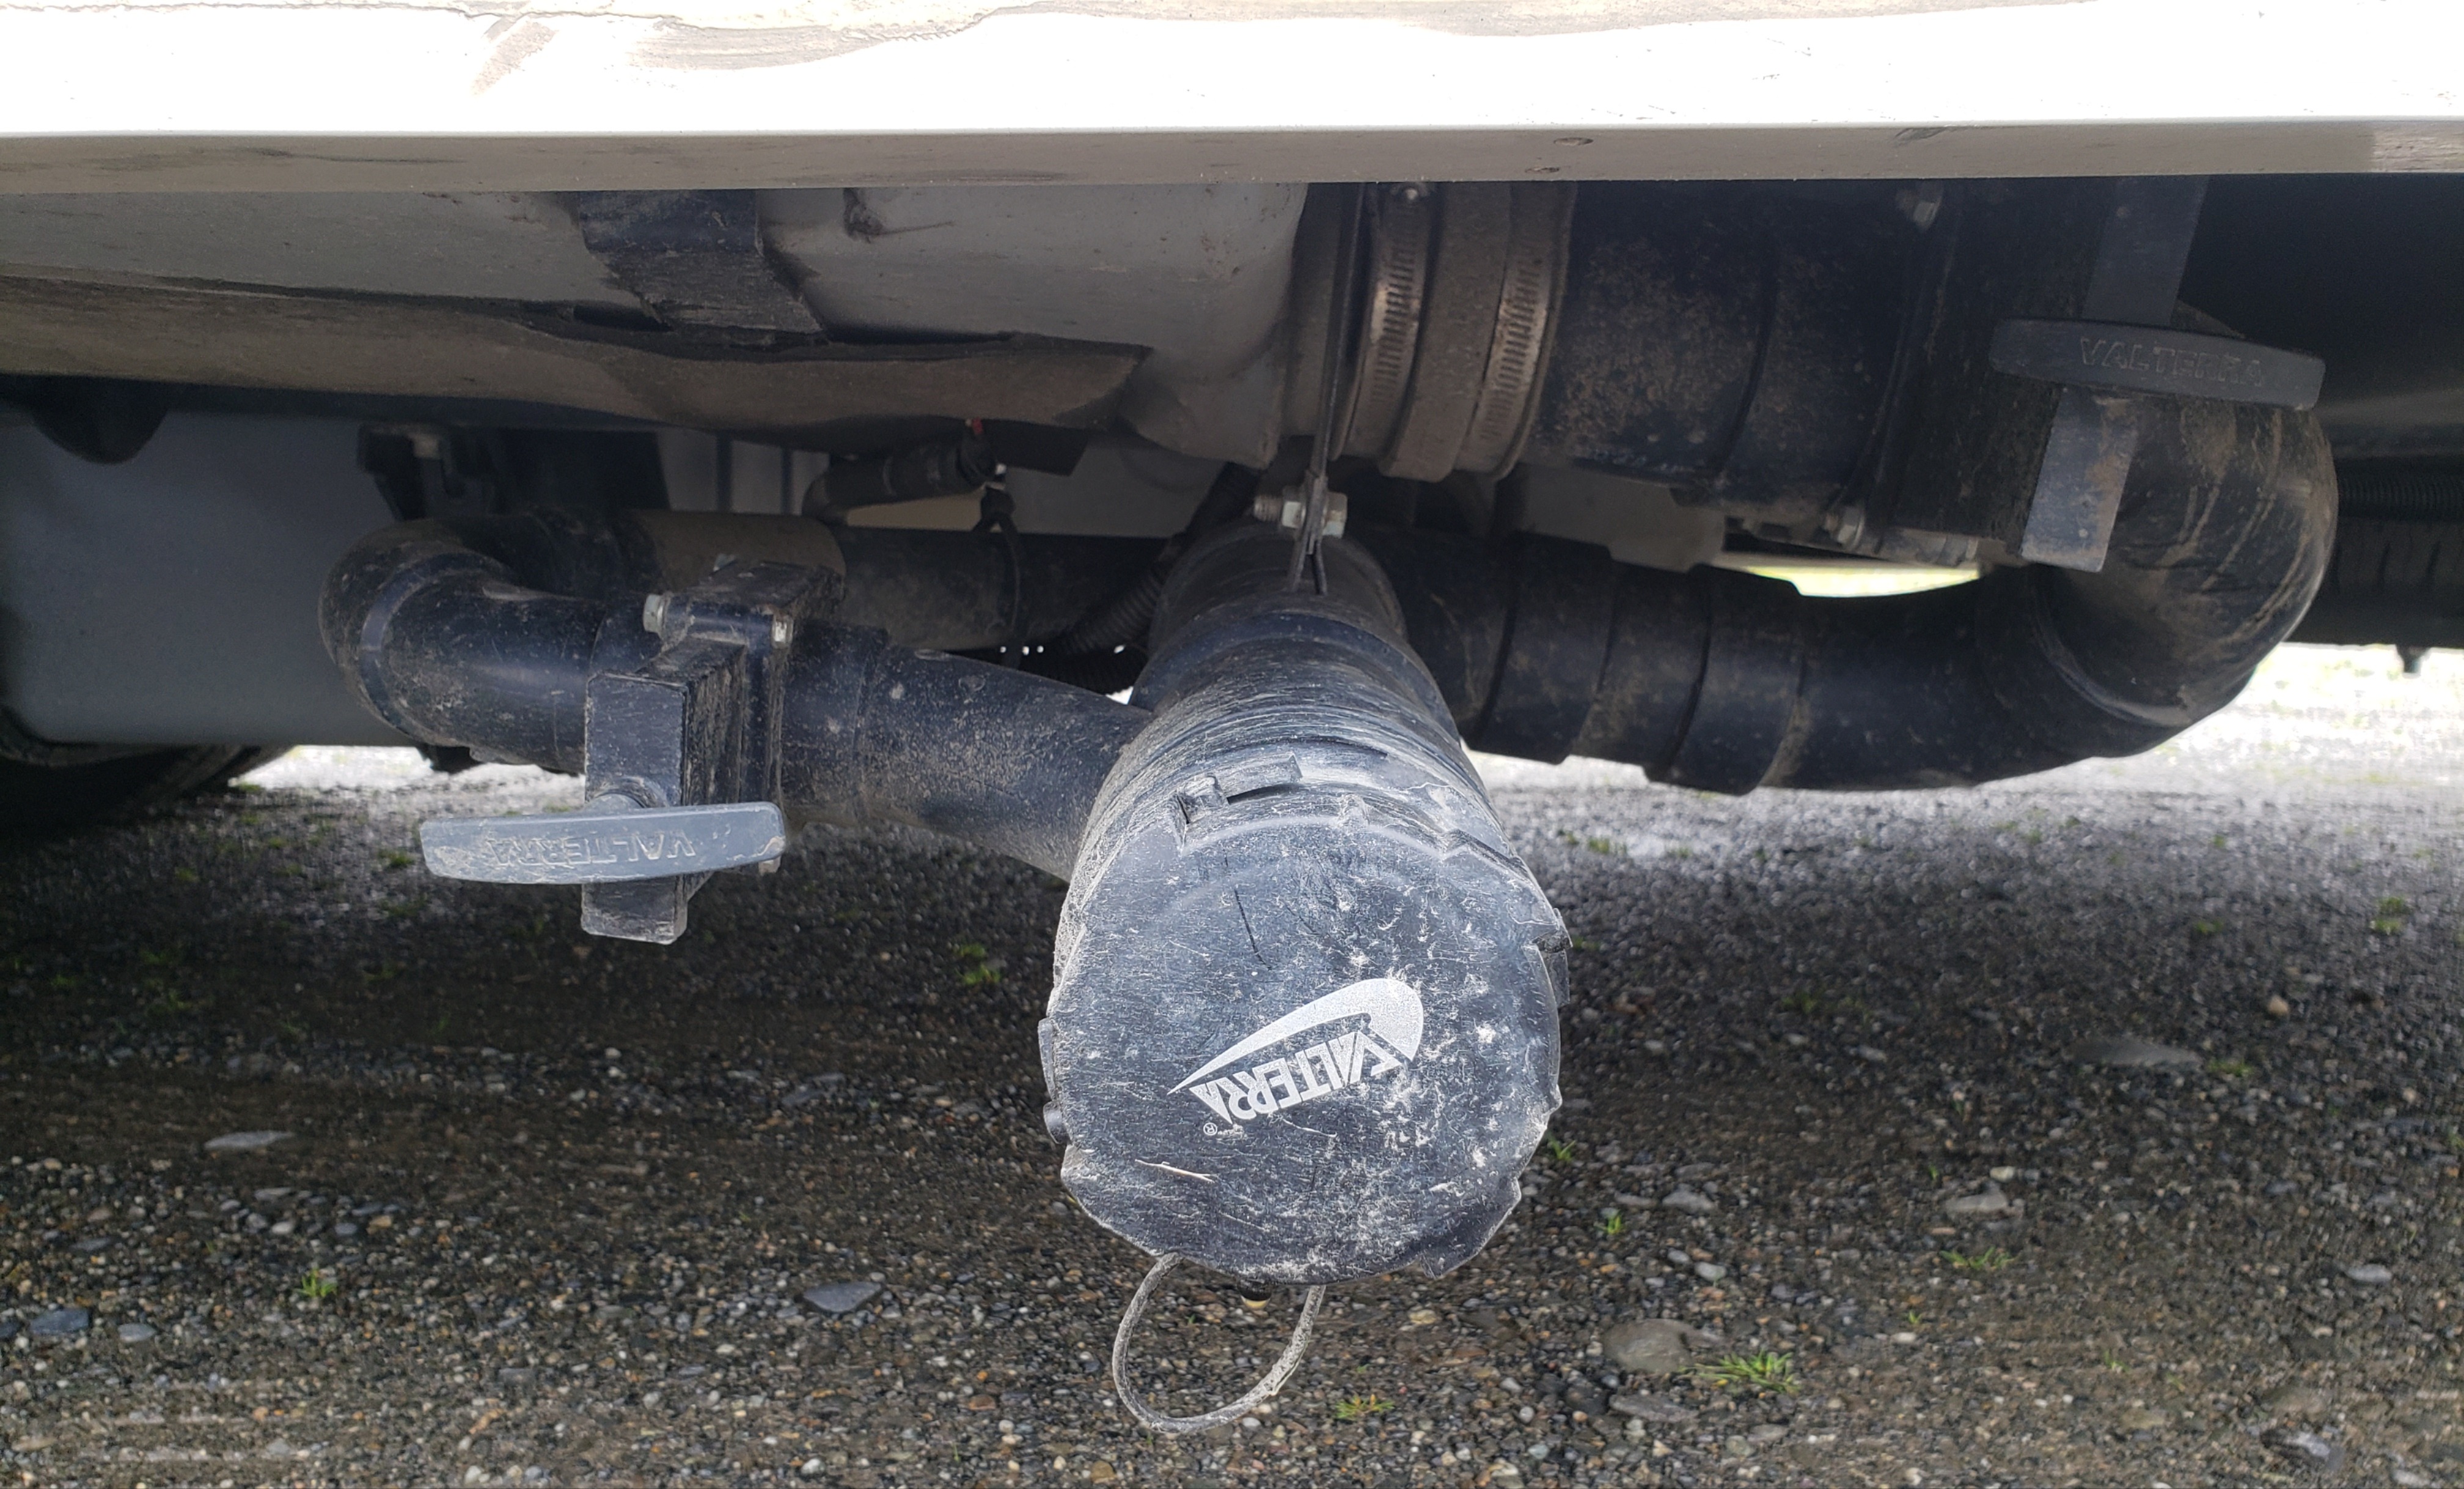
Unscrew the cover slowly (it is possible that a little, but only a little, will spill out when you unscrew the cover) & screw the hose onto the pipe. Once both sides of your hose are secured-pull the lever labeled “black” out & you’ll hear a gushing sound as the tank empties through your hose into the pipe in the ground. Always empty the “black” tank first. When you don’t hear anything going through the hose anymore, give it a good couple of shakes to make sure whatever is left in the hose goes down. Then pull the “grey” lever. Again, you’ll hear a gushing sound as the grey tank empties into the pipe. When no more flowing is heard, again, give it a couple of shakes. Push the black & grey levers firmly back into place so that nothing will come out of the tanks anymore. Go back to the panel in the RV to make sure that the lights indicate that the black & grey tanks are now empty. Then slowly unscrew the hose from the RV & screw back on the cover (again, you might have a little bit of spillage here). Then remove the other end of the hose from the hole leading underground. Shake it out carefully while removing it to ensure that the last bits of sewer have gone down. There is usually a nearby water faucet. Rinse out the hose and the ground (if there was any spillage), return the hose to the compartment in the back of the RV, put back on the cap, and dispose of your gloves.
P.S. the first time I did it, it took some time to get it right. But after a couple times, the whole dumping & water filling process took me under 10 minutes in total.
Electricity/Power
Your RV is powered by a number of different ways. For me this was the most confusing. I’ll try to simplify as best as I understand it myself. To really understand it all well you’re probably better off reading up on the technical parts as to what powers what, how, and when. But I’m going to try to write it in just simple layman’s terms without a lot of the jargon. There are basically 3 ways you can power the living part of your RV: 1. by the RVs battery, 2. by the generator, & 3. by being hooked up to an electrical source. In typical mode, when driving or just sitting in a parking lot etc. you’re only using method #1-the battery. The thing is, that doesn’t have a lot of power. It’ll keep things like your fridge running, the pump (that sends water through the sink & flushes your toilet) running, your heat (in cold places) etc. But it will NOT power your outlets, microwave, electric stovetop, TV screen, air conditioning etc. Also, if relying on this battery, it is liable to die out after a few hours because it gets charged usually by having the engine of the vehicle running, so when engine is off overnight or any time during the day, the things that are on could drain the battery (like any car if you leave the light on overnight). And then you’ll have your fridge shut down, your instrument panel shut down etc. To compensate for this, you can use any of the 2 other power sources. Either turn on the generator or attach to an outside electrical source. Most RV campsites today offer 20, 30, or even 50 amp hookups. Without going through all the technical of it, it just means you can be hooked to a much stronger power. How to choose between the 2 (generator or hookup) is really quite simple. When you’re in an RV park, you’ll most probably be hooked up to an electrical source. This way is better because it saves you from using propane (which is what runs the generator) & most RV campsites don’t allow use of generators, for sure not overnight. See below the section on what to do when parked in RV park. If you’re not in an RV park, turn on the generator when you need outlets (e.g., for Betty Crockers, air conditioning, blow dryers etc) & then shut off when done. One additional piece of information that is necessary is that most RVs today come with a button on the control panel called “inverter control”.
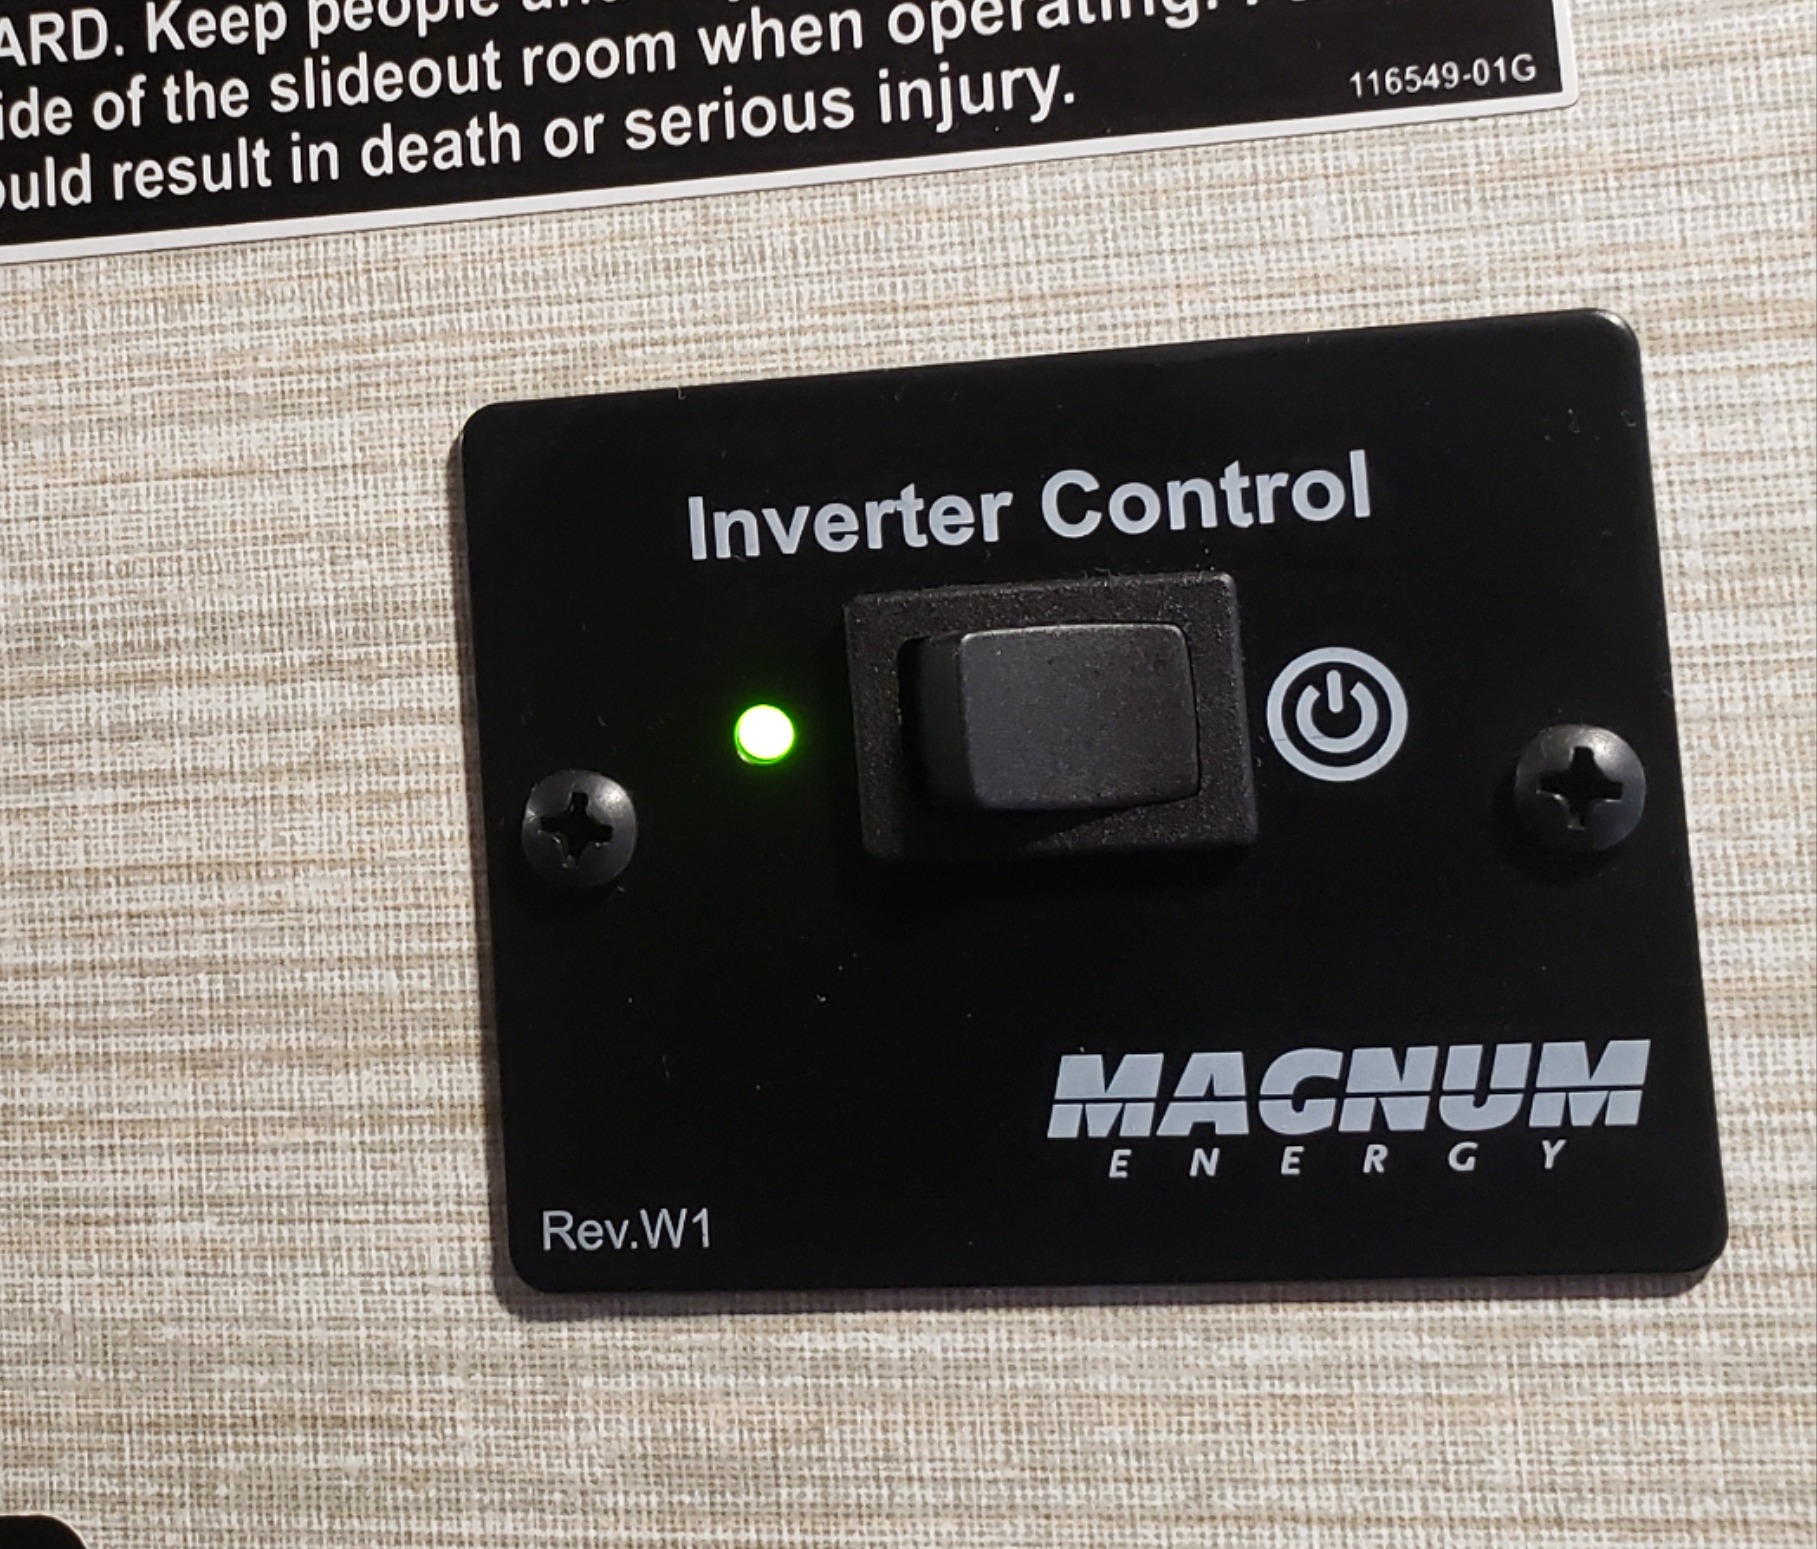
What this does is that it will power just a few things with an extra boost of power for a bit of time from the battery. It will usually power the microwave, TV screen (or the outlet of the TV screen), and 2 outlets in the main bedroom). This could help like if you need to use a CPAP machine overnight but are not in a campsite plugged in to electric.
Parking in an RV Campsite
When researching RV campsites to stay at you really want to look for one that offers as many of the amenities as you can. Yes, you can totally boondock (just a fancy word for camping in an unofficial place, that is not a campsite) but I’ll outline for you the benefits of what you can get at official campsites and what you’d need to do for each thing if it is not offered. Look for the following:
1. Electrical hookups (preferably at least 30 AMP). If this hookup is available, you’ll be able to have anything you need running the whole time and will never have to worry about using the generator, or if you have enough propane to run the generator, or what appliances you can use when etc. What you’ll do is as follows. On the bottom of your RV, in one of the compartments, you’ll find a thick wire (usually black) that has a plug at the end of it, which currently is plugged into an outlet inside that compartment. When you get to the campsite that was assigned to you, you’ll see what looks like a small electrical box.
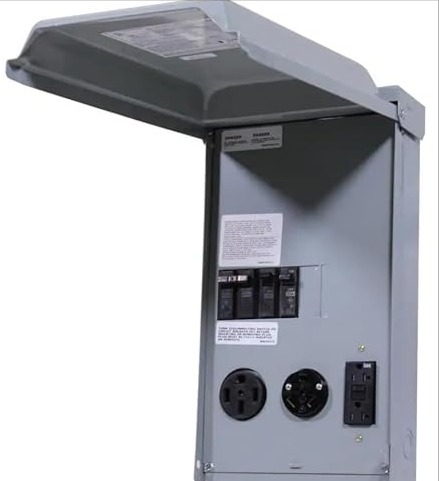
Unplug the wire from the RV outlet in the underneath compartment & plug it in to the corresponding outlet in that box. You’ll often see a few different kind of outlets that you can plug into in that box but only 1 of them will have the right one for your particular type of plug. Once plugged in, make sure the circuit breaker is in the on position. To check if you are hooked up properly, go look to see if the microwave clock is on. That only powers when the RV has the extra boost of power. Note: some older campsites might not have full power (30 or 50 amp) available but do have a lower level power. In that case the electrical box will only have an outlet similar to what you have in the wall in your house. Your RV will most probably come with an adaptor, which can usually be found in that compartment under the RV where the wire was plugged into originally. This adaptor basically has an outlet that can take your kind plug on one side and, on the other side, a plug that goes into a typical wall kind of outlet.
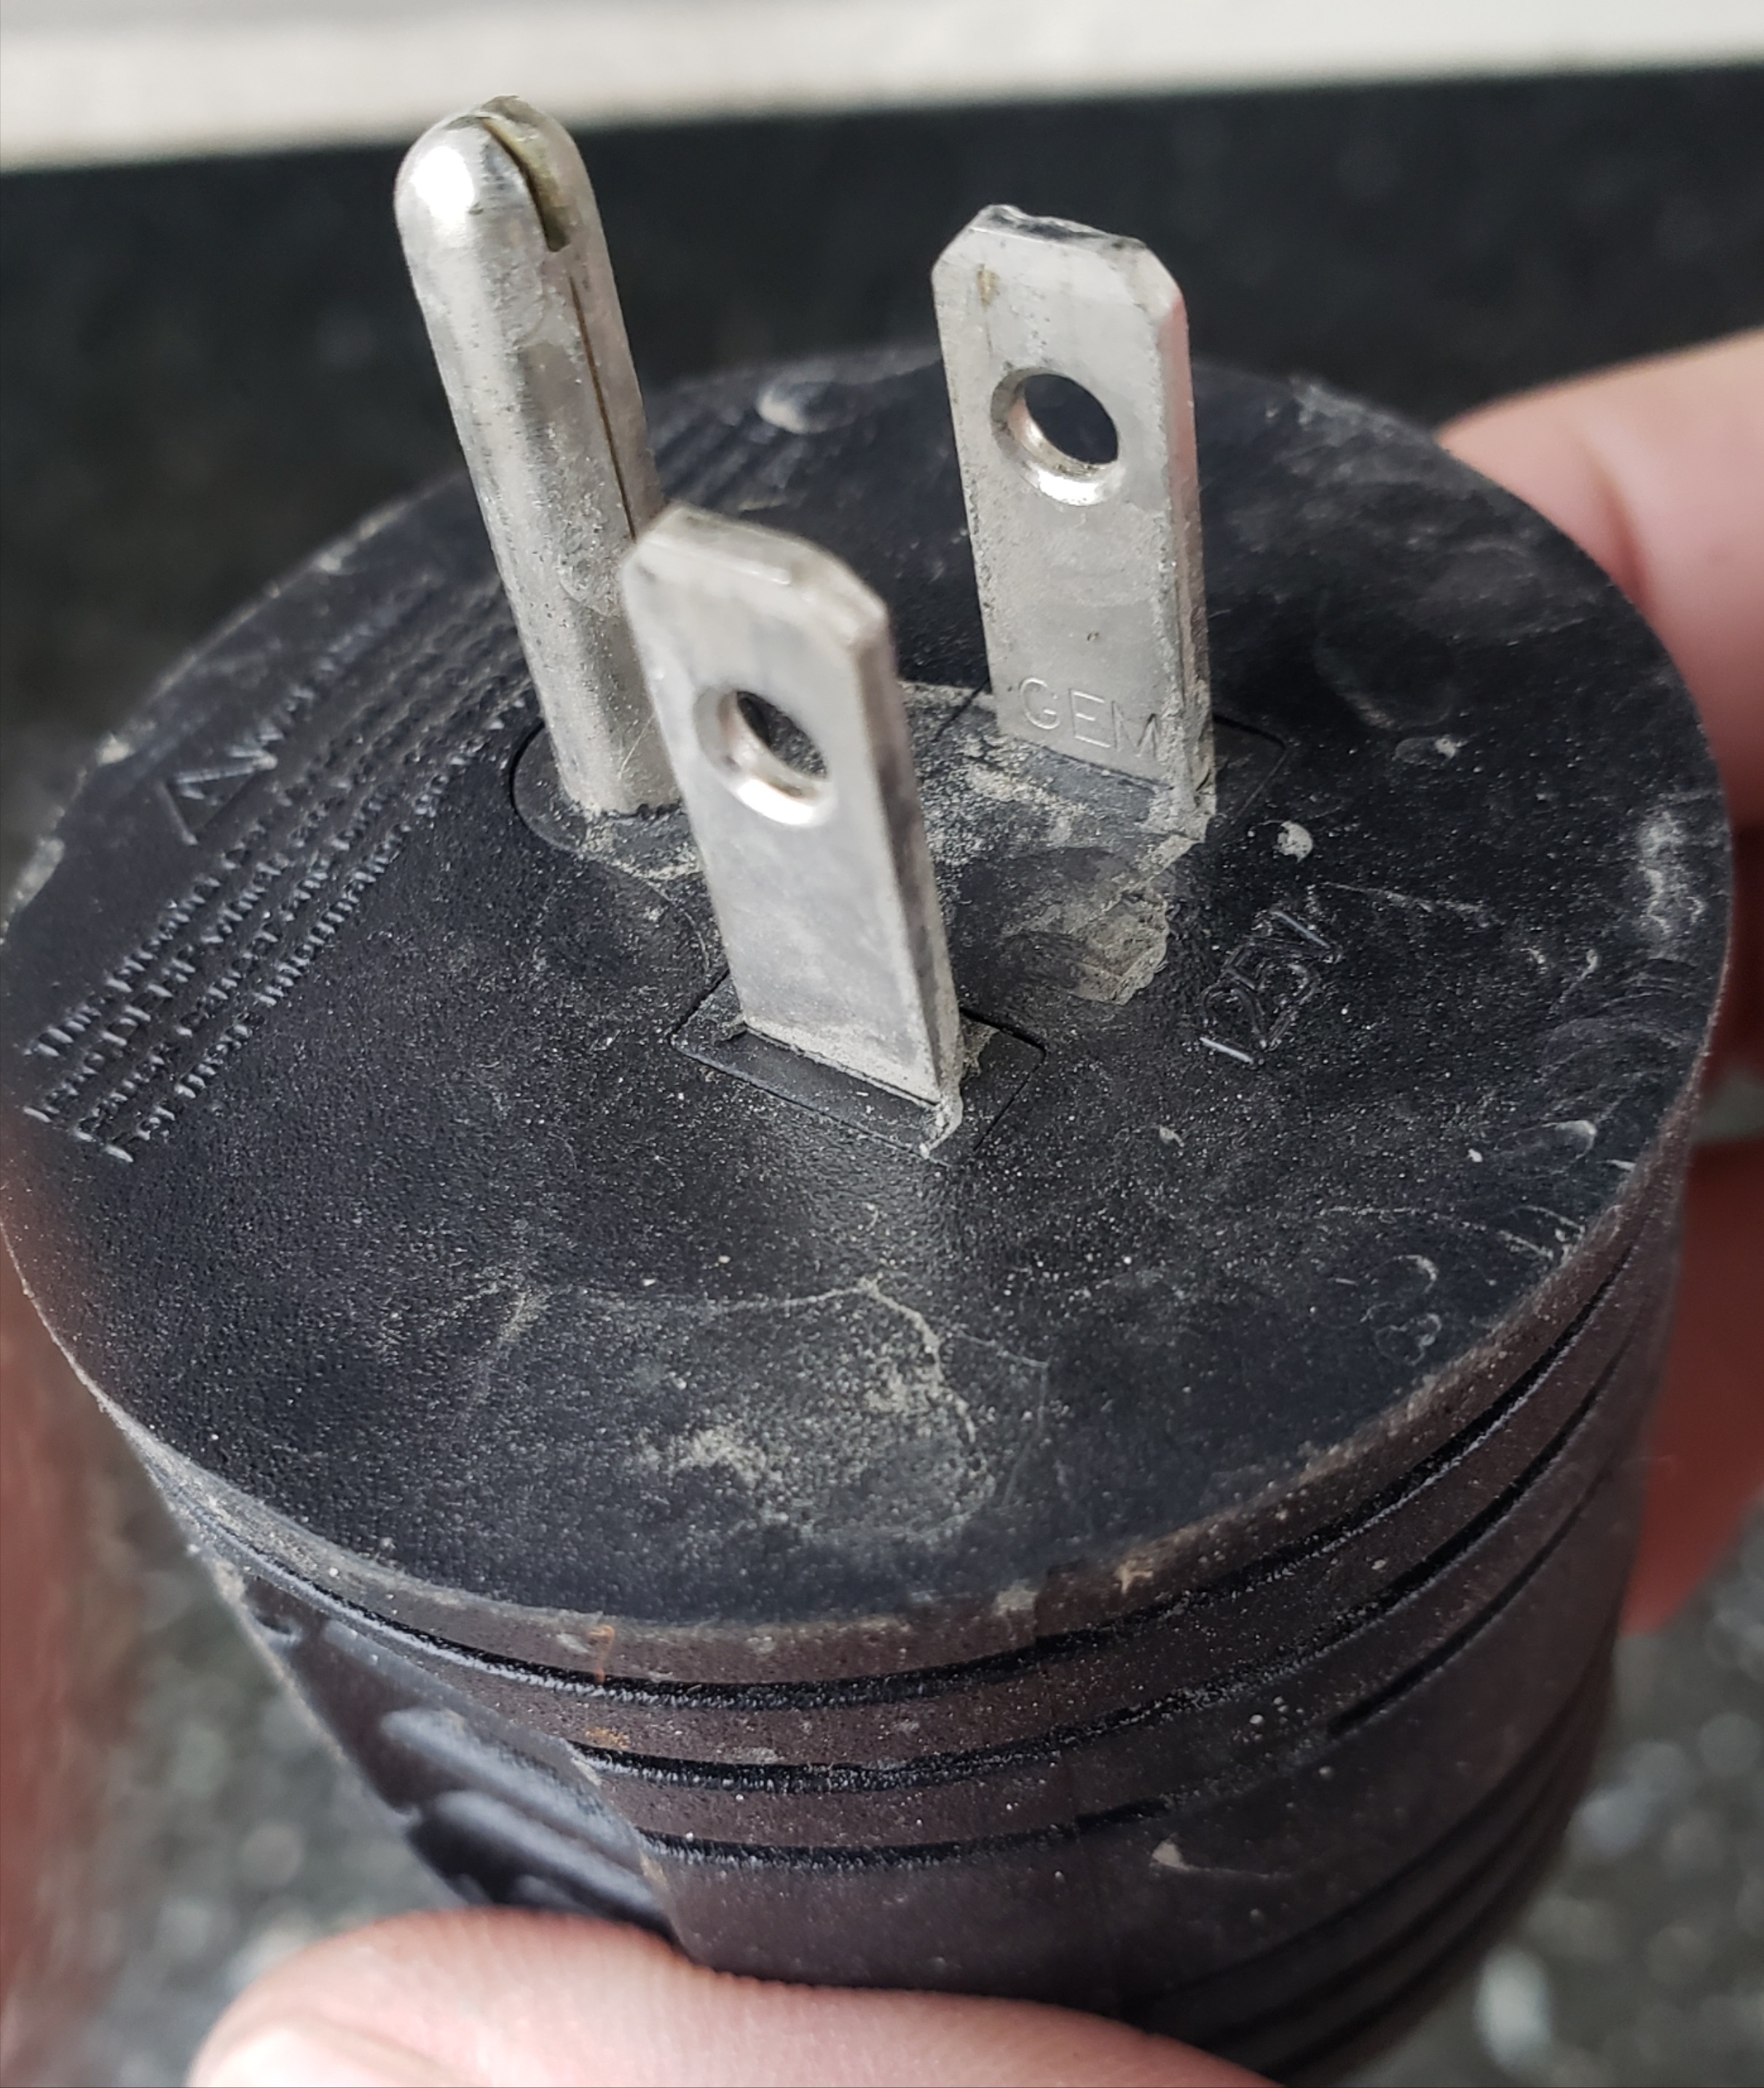
Plug your RV wire in that the adaptor and then plug the adaptor into the regular outlet in the electrical box. If using the adaptor, you will not be able to use outlets, air conditioning etc in your RV but you’ll hopefully not be having your battery drained from the fridge etc.
2. Water hookups. This basically allows you to have water flowing freely into the pipes of your RV without using up water from your water storage tank. To use this, find that hose in the compartment under your RV that you usually use to fill the water tank with Follow the same procedure as outlined in the section called WATER above, but this time instead of attaching the hose to the part of your RV labeled “tank fill”, attach it to the one labeled “city fill”.
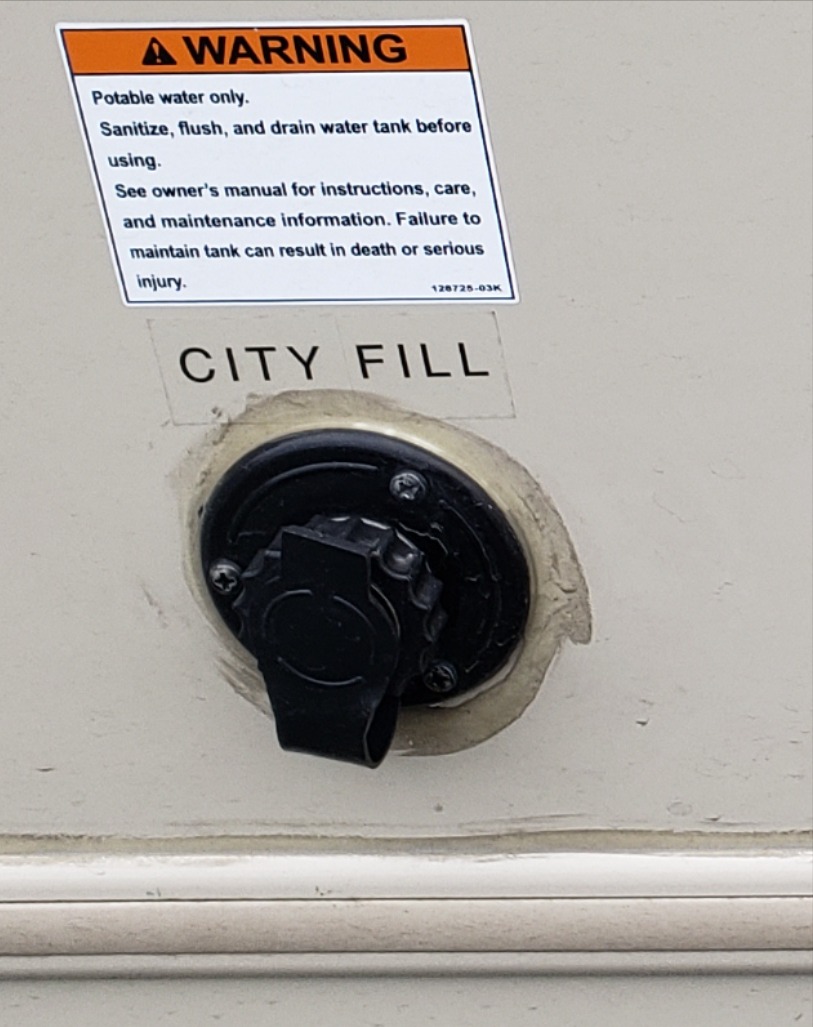
This will automatically make it that the water you use while hooked up is not from your water tank but rather straight from city water.
3. Sewer hookups. Not every RV campsite offers this but, if they do, it’s a great benefit. Basically it’ll be like your house where the dirty water from your sink & showers, as well as all toilet flushes, go straight into the sewer instead of into the into the grey & black storage tanks under your RV. You will hook up to them the exact same way as you would dump your tanks, as mentioned in section called SEWER. Except here, after opening both the black & grey levers, you would not close them and you would just leave the hose attached to the RV, the other side in the hole in the ground, & both levers open.
4. Proper grading. It is important to always keep the RV on a straight level, not pitching to any side. If an RV is leaning forward, toward the back, or toward the sides, it can ruin the fridge mechanism beyond repair. Therefore, whenever you’re parking the RV for more than just a few minutes, you need to make sure it is leveled properly. A good RV park will have proper grading to ensure that all the parked RVs are level. In your RV, usually somewhere on a counter in the kitchen, you’ll find a level indicator.
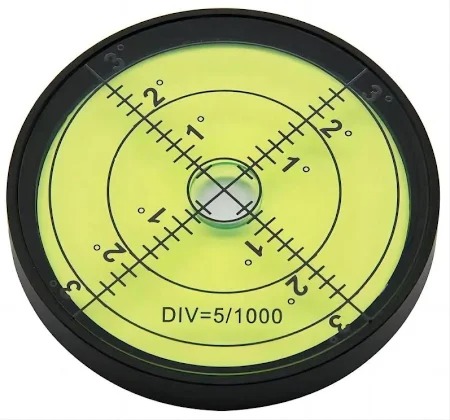
The bubble will have to be at least partially in the center portion. If, for whatever reason, it isn’t showing that it’s level, your RV rental should provide some leveling blocks. These are basically pieces of wood, plastic, or another material that you can drive one or more of your wheels onto, thereby leveling your RV a bit better.
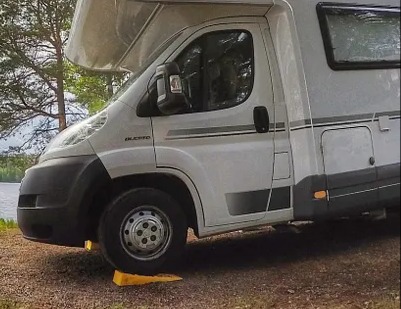
A good RV park, though, will have less of an issue with this.
5. Showers & laundry. Even though your RV is equipped with a shower, it still is only 1 shower. If traveling with a bunch of people, you may find it beneficial to have an RV park that has a number of public showers. Some will require quarters or dollar coins to run the shower for a certain amount of time, but if you research well, you can find many that include that in the price of overnight camping. Many RV parks will provide washing machines & dryers. These will require quarters or other money to be fed into the machine to be used. These are not a necessity but we found them to be quite helpful to have.
Remember, upon leaving the RV camp to make sure that you’ve unplugged everything & stowed away the hoses & wires properly; that you’ve retrieved any levelers & stored them back under the RV, that you’ve refilled your storage water tank, & that your black & grey tank indicators are showing that they’re empty.
Propane
Each RV comes equipped with a propane tank. Mainly you’ll need it to power your generator as discussed above. It does also provide some of the power to the fridge. In order to make sure that when you need to turn on the generator, you’ll have enough propane-you can check on the panel indicator which will be described below, to see how much propane is left. If you need to refill propane, most gas stations do that. However, you are generally not allowed to do it yourself. You’ll have to ask one of the gas station attendants, who have been trained for this, to do it for you.
Indicator Panel
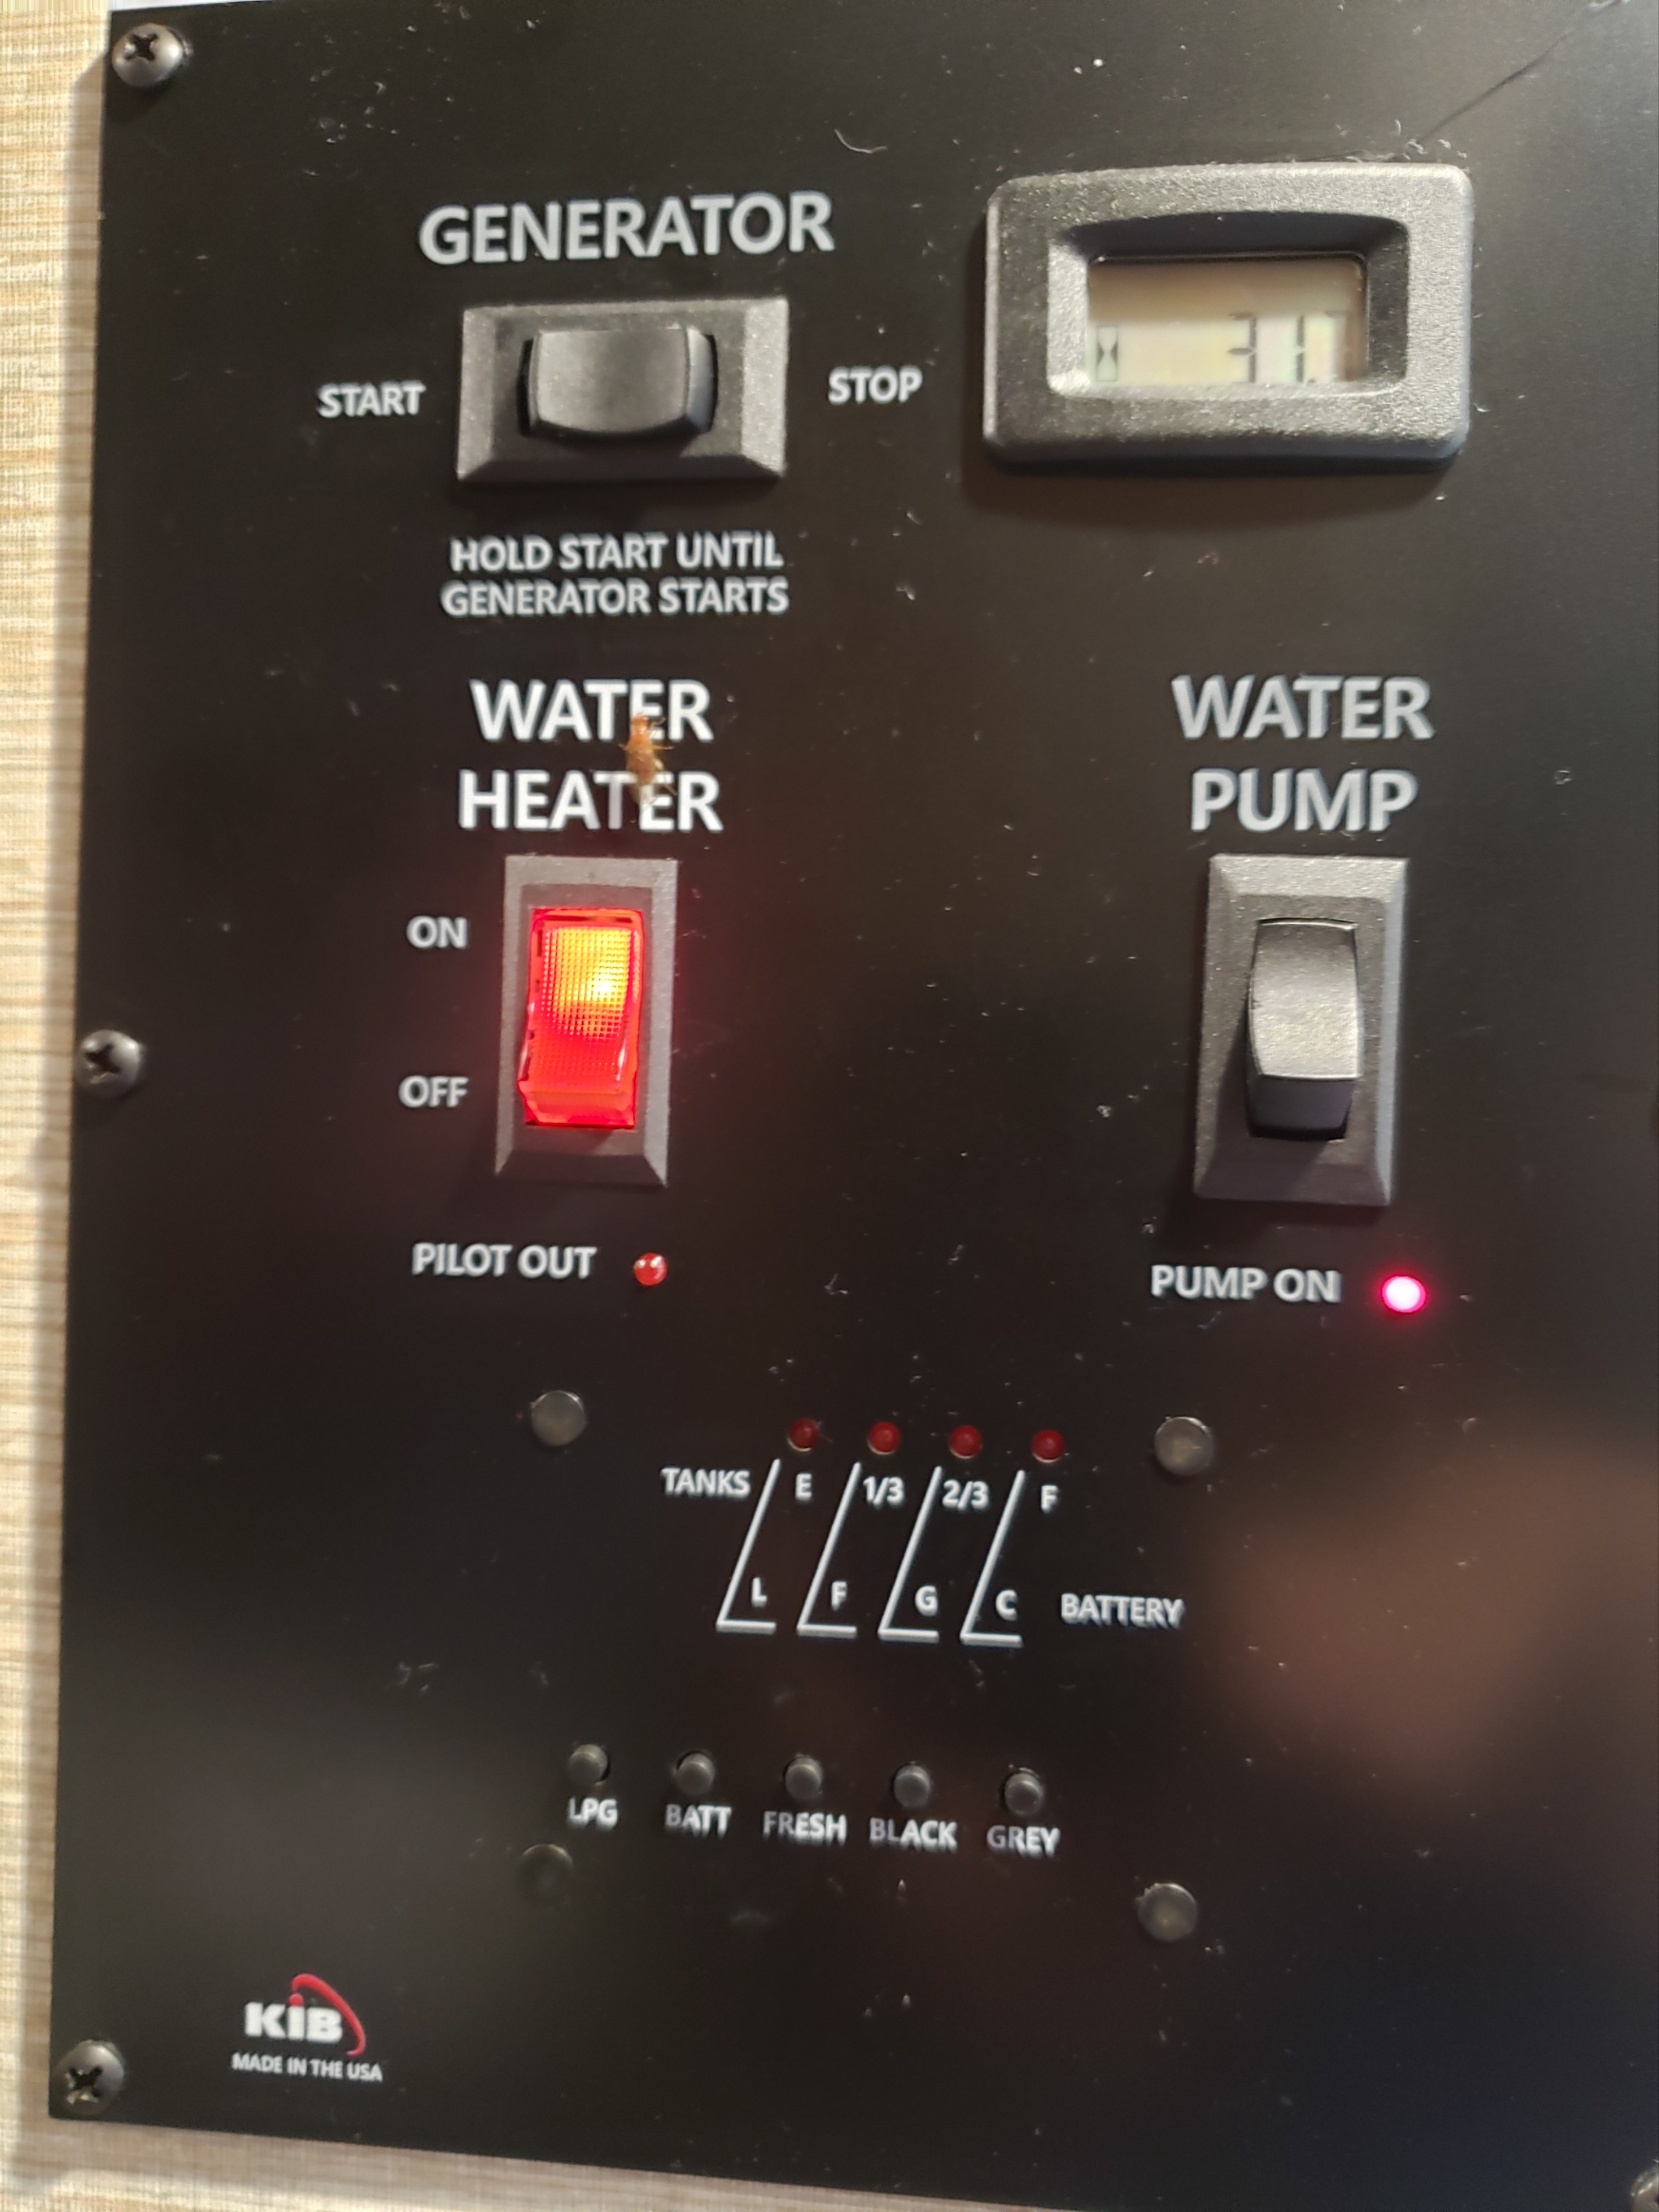
This panel, located usually in a central place on the wall in the RV, is your “eyes” to what is going on inside the “kishkes” of the RV. It will tell you how full your grey & black tank is, how much fresh water you have left, how much power the battery has left, & how much propane is left. It will also usually allow you to turn on/off the water pump, turn on/off the generator, turn on/off the inverter control, and turn on/off the water heater. The way to check the levels of the above is to push the button for each requested thing for 1 second. If all lights are lit up that indicates “full”. So by battery & propane (lpg), as well as fresh water, the more lights that are lit up- that’s a good sign. For grey & black, the more lights that light up, the more full it is and the closer you are to having to have the need to dump.
Storage/Organization
Since everything in the RV can shift while driving, a good idea is to pack everyone’s things in packing cubes. You can order them for very cheap online. They keep everything in the drawers contained & easy to find and access when needed. The RV is designed to maximize as much of the space as possible. There are all sorts of cabinets for all your items. Also, under the RV itself there are compartments that are accessed from the outside. We kept many things there such as all our extra water, paper goods, grill, hiking boots etc. Some compartments are even large enough for you to store a few of your empty suitcases.
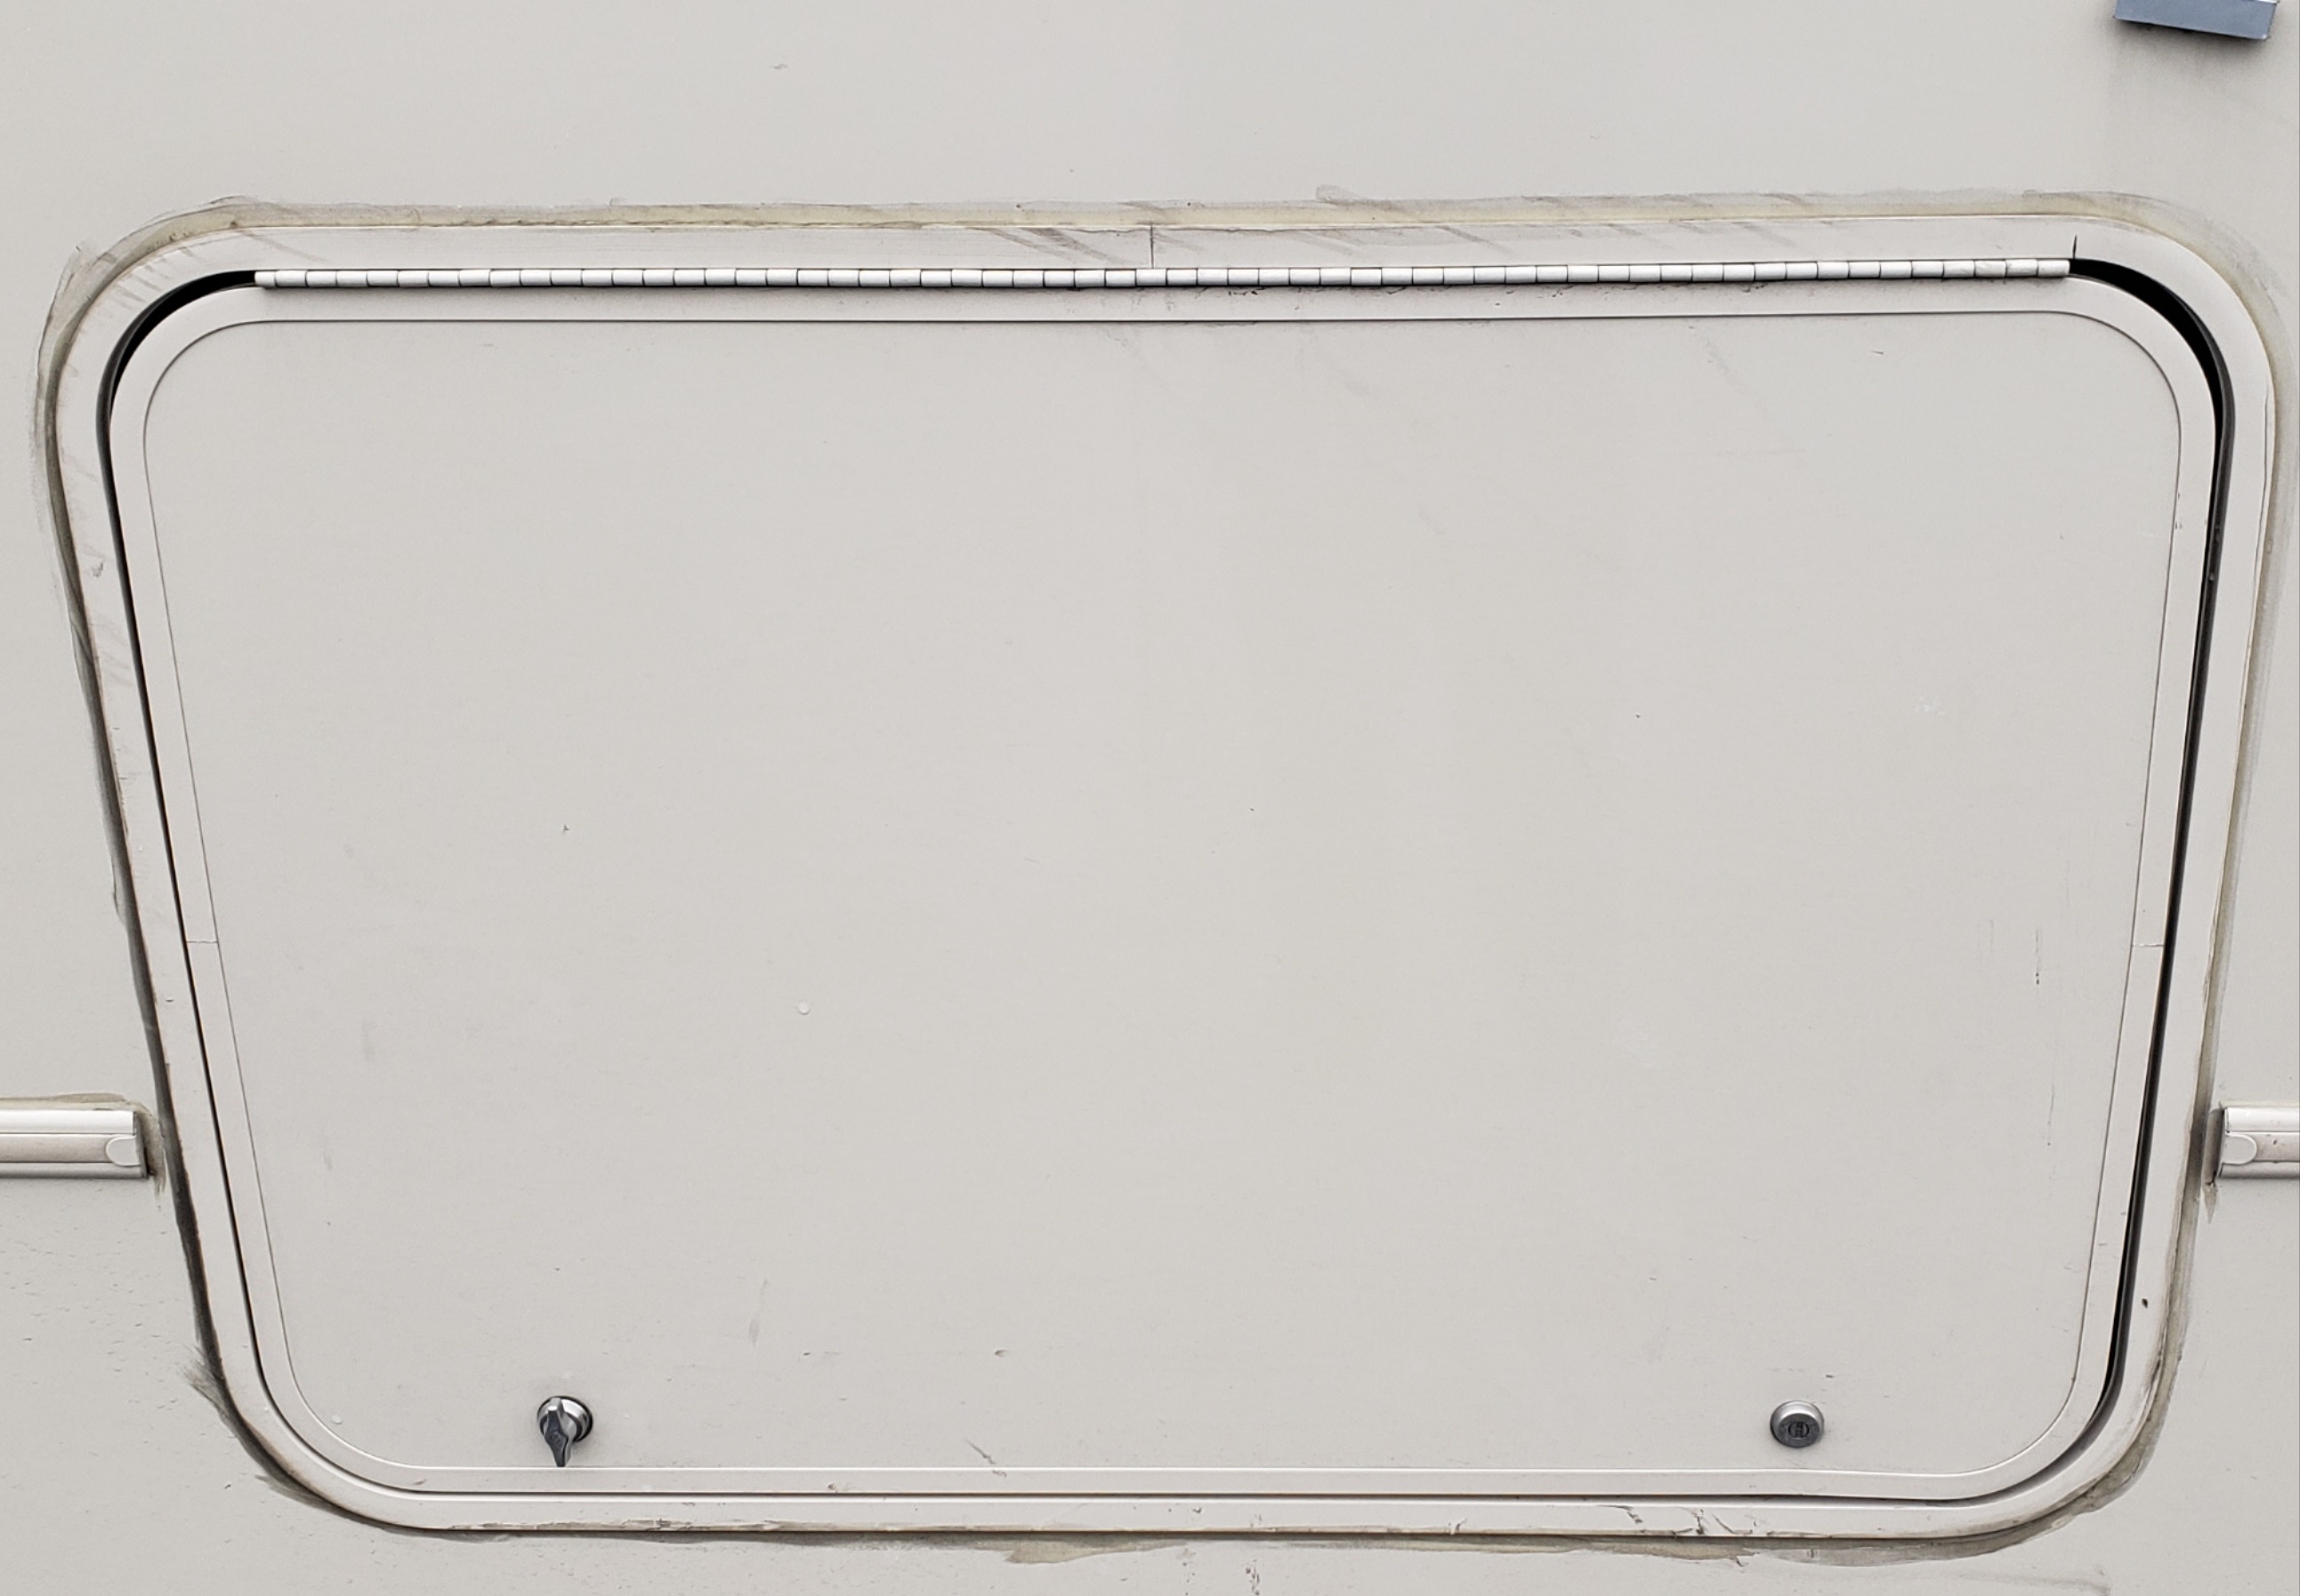
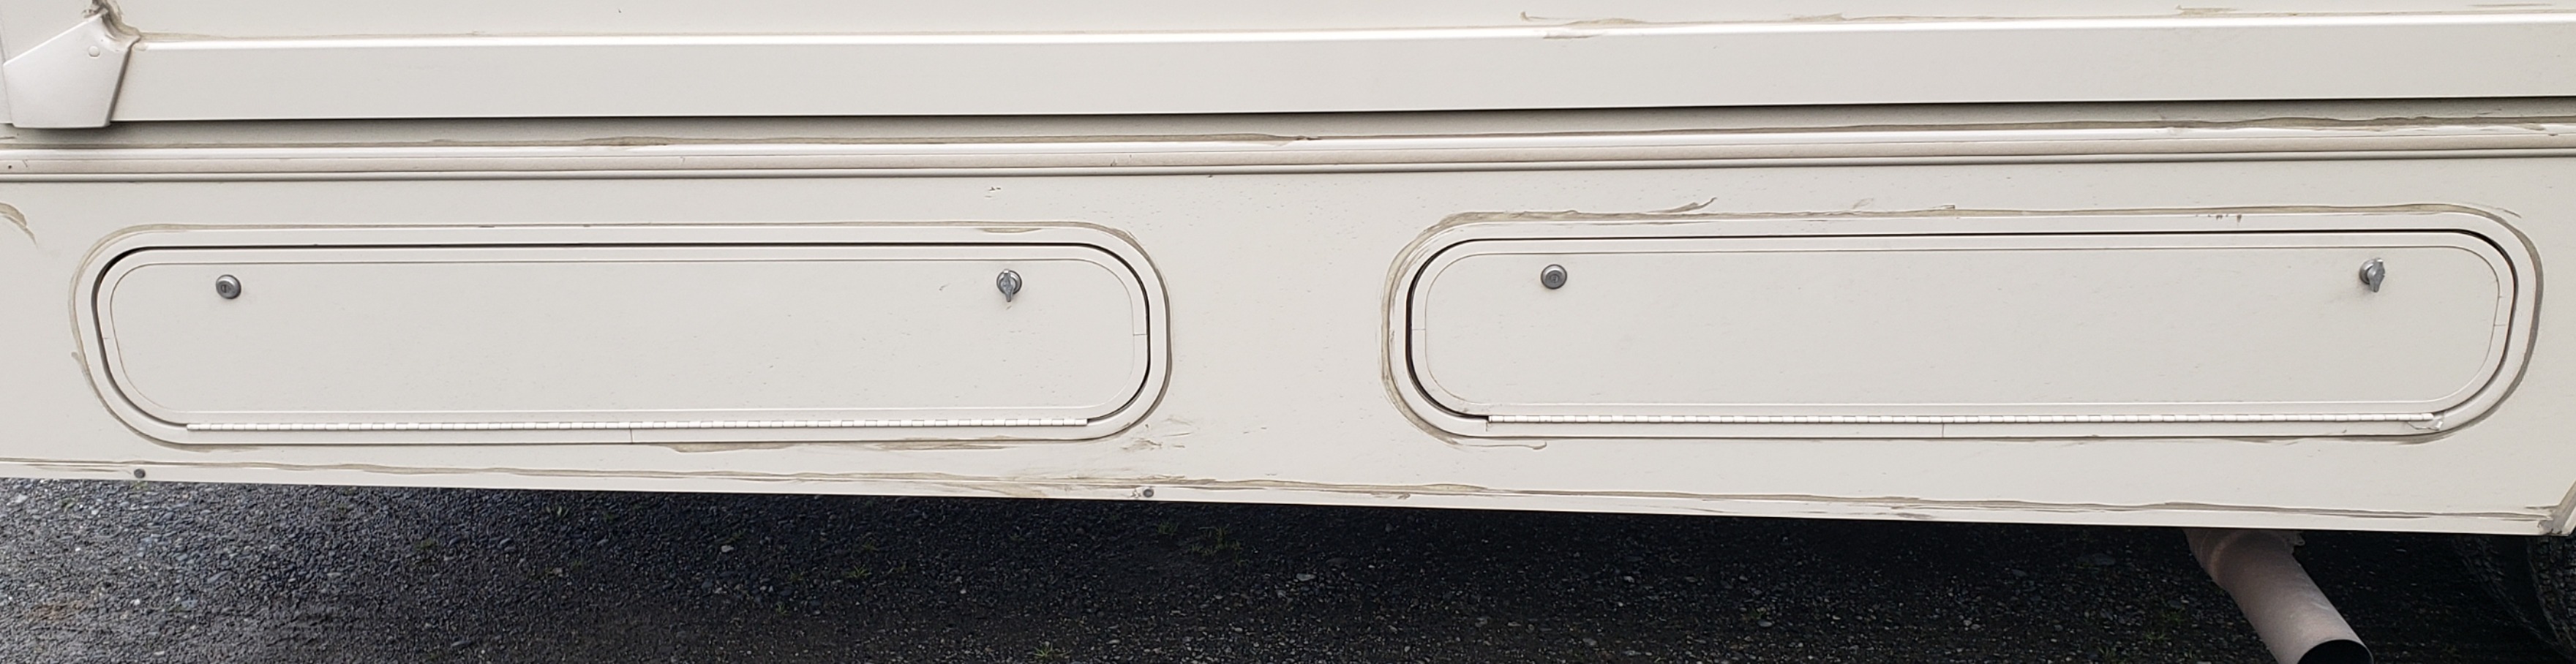
The RV company that I used also offered for a very minimal fee to store our empty suitcases in a storage room in their offices during our time out on rental. Some other good ideas that are sometimes overlooked are to store things in the space under the benches by the table, in the space under the beds, in the oven, & in the microwave. Another good idea is to ask the RV company if they’d take back all the pots/pans, dishware, silverware, glasses etc for the duration of your rental. I explained to them that since we only eat kosher we have no use for them & rather need the space for our own kosher dishes.
Keeping Neat, Fresh, & Clean
Having a bunch pf people living in a not-so-spacious area can get very messy, dirty, & smelly quickly. Also, IMPORTANT, anything that is not secured can go flying while the RV is making a turn, or starting or stopping suddenly. Make sure that things aren’t left around. For example, we used to keep all our water bottles in the sink. That way they wouldn’t go flying. When opening a cabinet or fridge while or after driving, make sure to open it carefully. Things could’ve gotten moved around and can fall out suddenly (imagine a dozen eggs falling onto the floor-true story!) Often the RV company will supply a few deodorizer pods so you can drop one into the toilet every time after you dump. Buy a few more of your own & use them liberally. Keep the toilet cover down at all times. Buy an air freshener or a Febreeze kind of spray & use it. We also swept out the RV at least once daily & used Lysol wipes to clean the floor often.
Final Thoughts
Truthfully, we were quite apprehensive about living with 6 people in an RV for 2 weeks. In retrospect, it was a fantastic idea. We never had to pack & unpack as we traveled around from place to place. We always had a bathroom & shower available to us. While I was driving the family could be eating meals so we didn’t have to waste time for that. Looking back, it was a fantastic experience & something we would strongly consider doing again!

Did you enjoy this article?
6
0
It is recommended to dump the RV sewer tank (black tank) only if it is 2/3 or more full, since the sewage leaves the tank by gravity it needs enough liquid to take along the solids when emptying the holding tank.
For the same reason when connected at a campground to sewer, the levers are kept OFF, and are emptied only when it is 2/3 or more full, so to make sure the tank doesn’t end up clogged with only solids…
KL is correct. That is the general recommendation when hooked up at a campsite.